

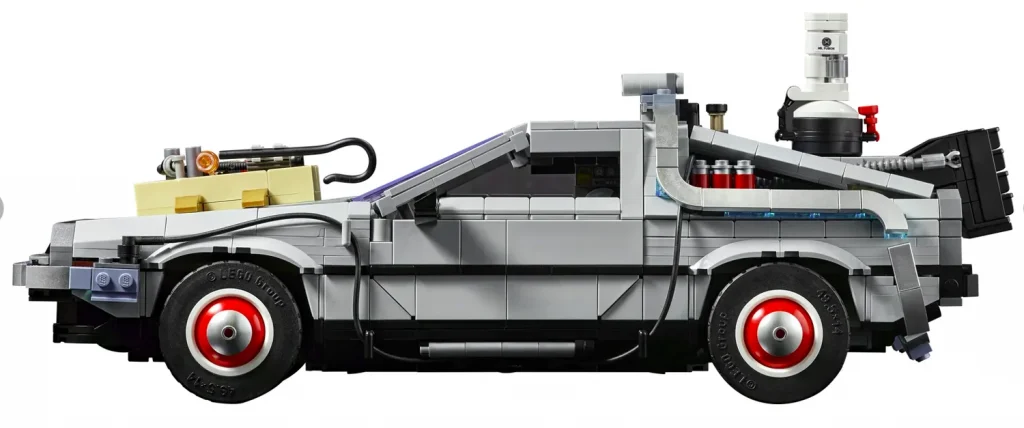
If you grew up in the 80’s or are a fan of vehicles, you will know of the DMC DeLorean. It’s a perfect match for the LEGO Icons series as it’s, without a doubt, an automotive icon! With the gull wing doors and brushed stainless steel panels, it was to have many advanced features for it’s time. Alas, the DeLorean Motor Company went bankrupt after just two years of production and around 9000 units produced. However, the inclusion of the car into the Back to Future series, arguably is what cemented the DeLorean into automotive folklore.

It’s not the first time the Back to the Future Time Machine has been created in LEGO. In fact, it was actually set #004 in the original Cuusoo series. The Cuusoo series was the precursor to what LEGO Ideas is today and helped deliver some early fan creations. As you can see, it’s a lot smaller than the modern re-creation with a little under 25% of the brick count. When the 2022 version was announced, you can imagine my excitement. So let’s get stuck in!
We start the build with 6 pages of information about the inspiration (the Back to the Future movies), the designer (Sven Franic) and a foreword from the show’s co-creator (Bob Gale). It’s a really great way to start a build and provides some very interesting info.

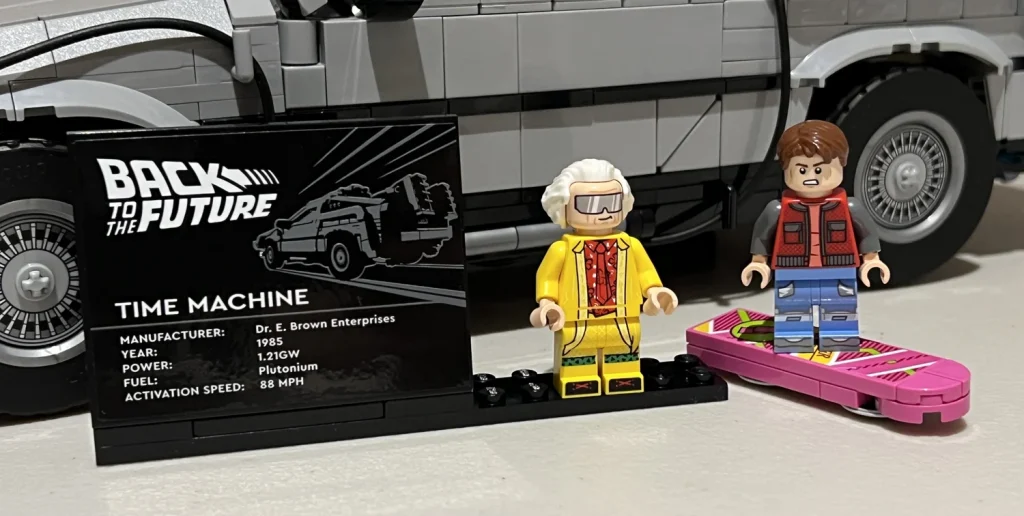
Straight out of the gate we build Dr Emmett ‘Doc’ Brown and Marty McFly. They are great renditions of the characters with the standout being Doc’s reflective shades. They looks fantastic. Both prints on the minifigs are detailed and reflect the characters really well. I particularly like Doc’s overcoat.
After building Doc and Marty, we move onto the Time Machine itself. Constructing the base is a mix of technic and standard LEGO bricks. Not only does the Technic pieces help provide structure, it also allows a fantastic play feature, but more on that in a moment. As you can see, there are plenty of coloured bricks used internally, so it’s quite easy to follow.
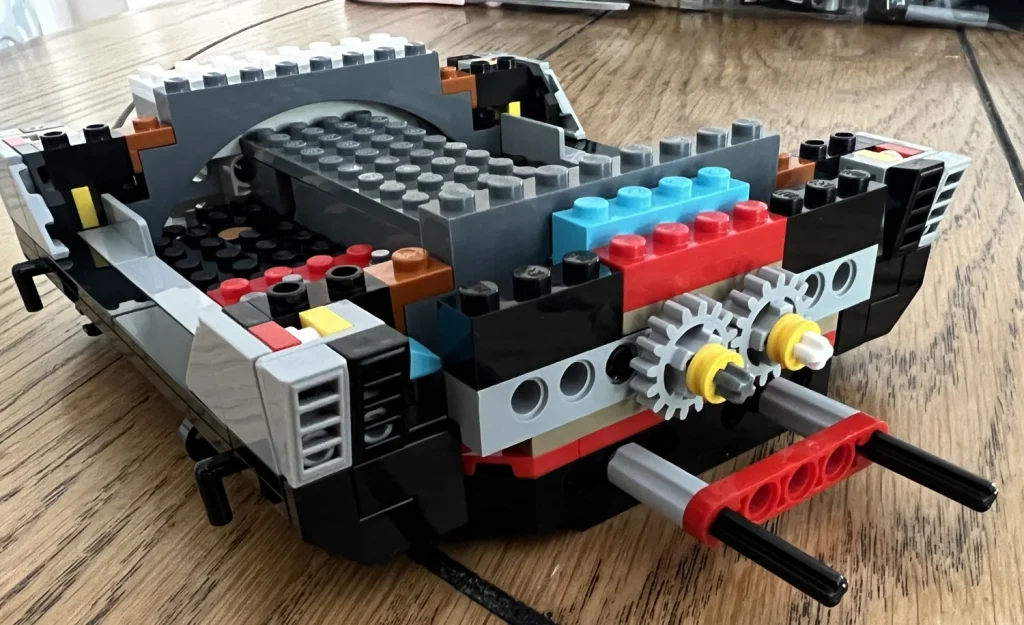
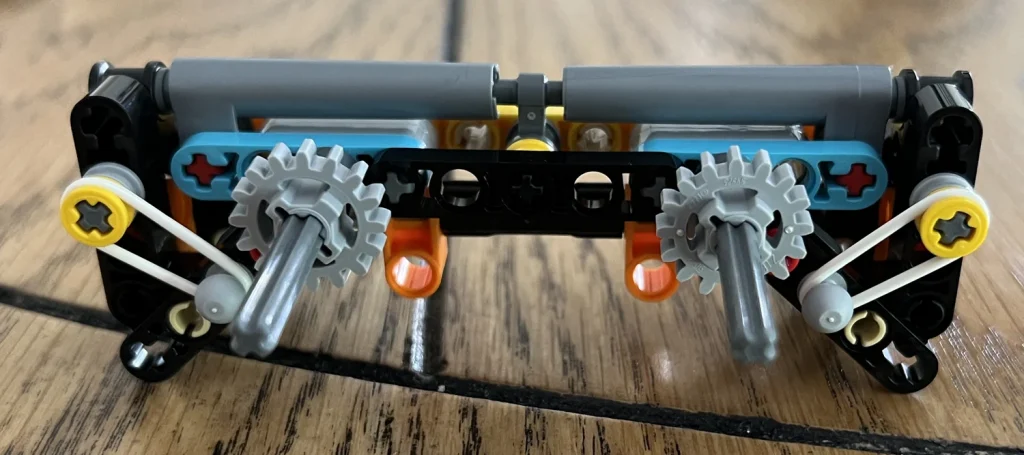
On each end of the chassis the following mechanism is built and slid onto the frame. It’s quite ingenious and ultimately allows the wheels to move from “standard” to “hover” mode. Each end has a different colour cross beam so you can align the model to the instructions as you’re building it.
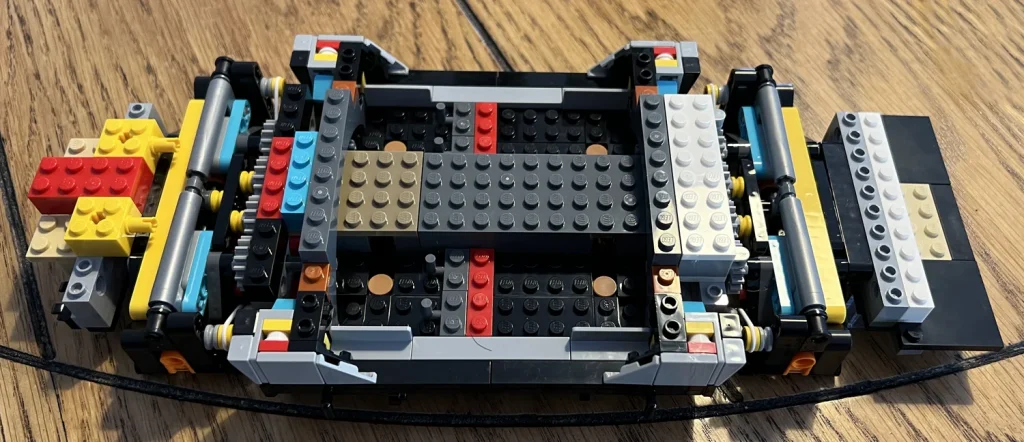
Progressing through the chassis, you can start to see it take shape.
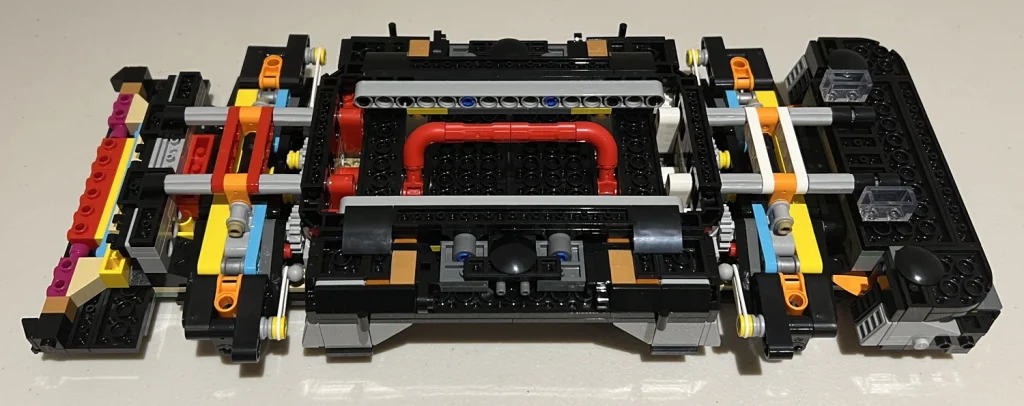
But flip the model over, and here’s where the action really starts. The designers have created the mechanism to adapt the wheel angle with a simply flip of the red lever. By pulling it down the rubber bands are stretched and the gears move the wheels parallel to the ground. It’s a really nice mechanism and I definitely spent too much time on “wheels go out, wheels go down, wheels go out, wheels go down”!
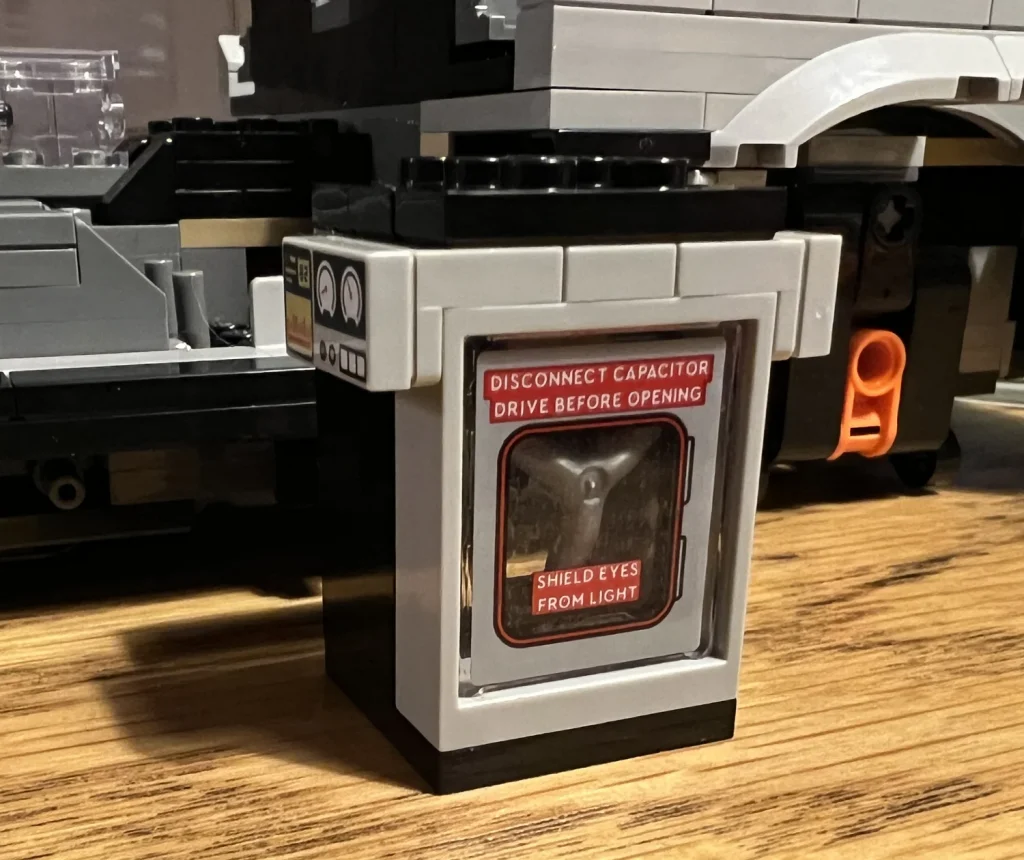
But, like we all know, what use is a Time Machine without a flux capacitor? Just a car is what. Hence, the Flux Capacitor is a vital part and through secret industrial spy’s we’ve got a pic of the unit before being installed into the Time machine for your pleasure.
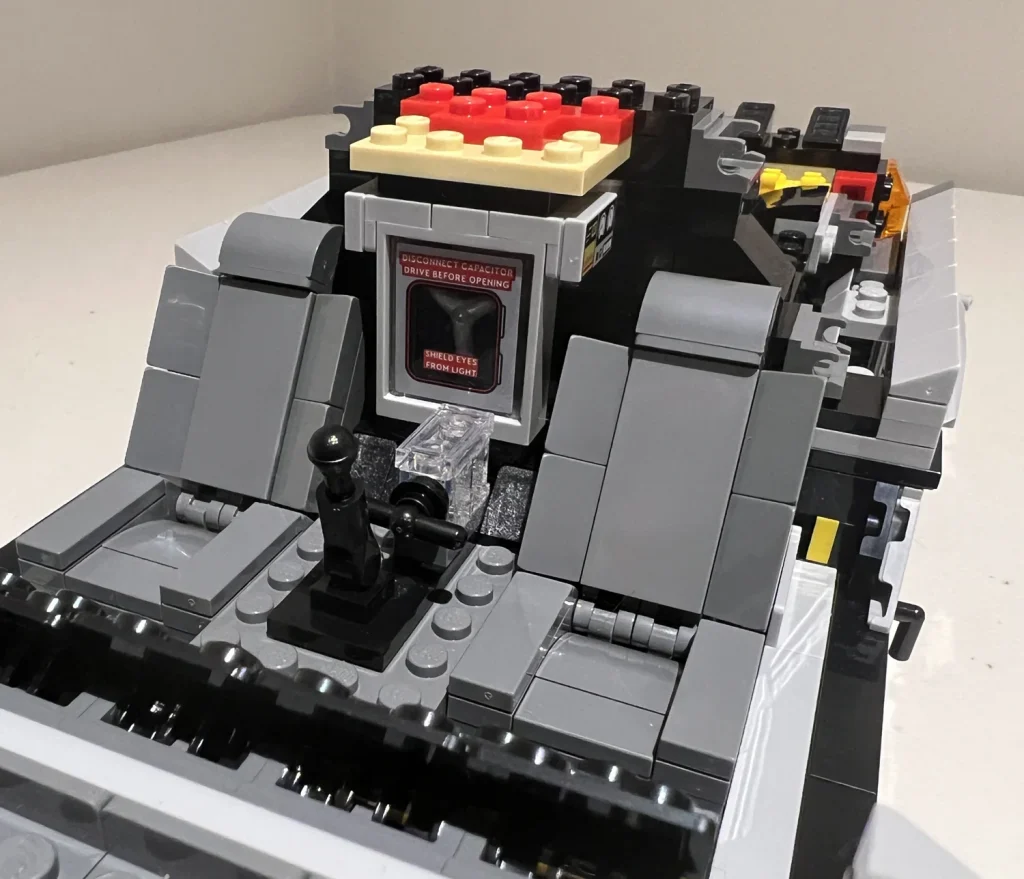
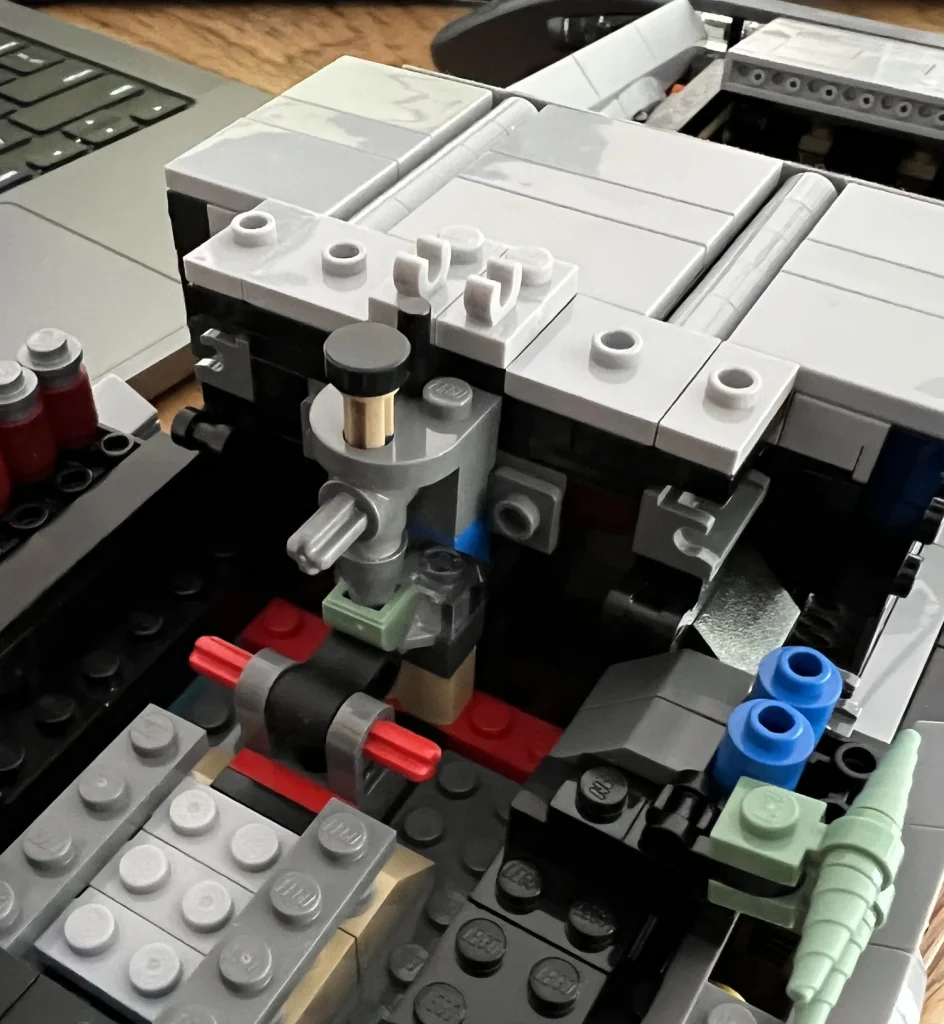
Once installed into the Time Machine, it sits nicely between the two seats. The seats are quite simple, but nicely bolstered. The use of the microphone as the gear stick along with the valve behind it look great.
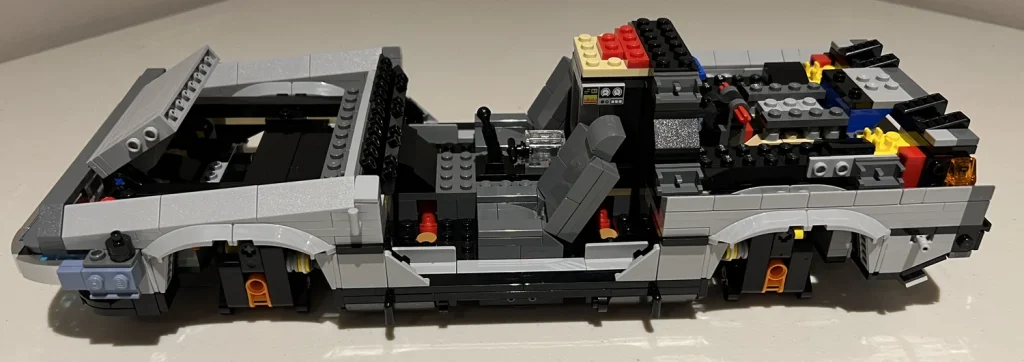
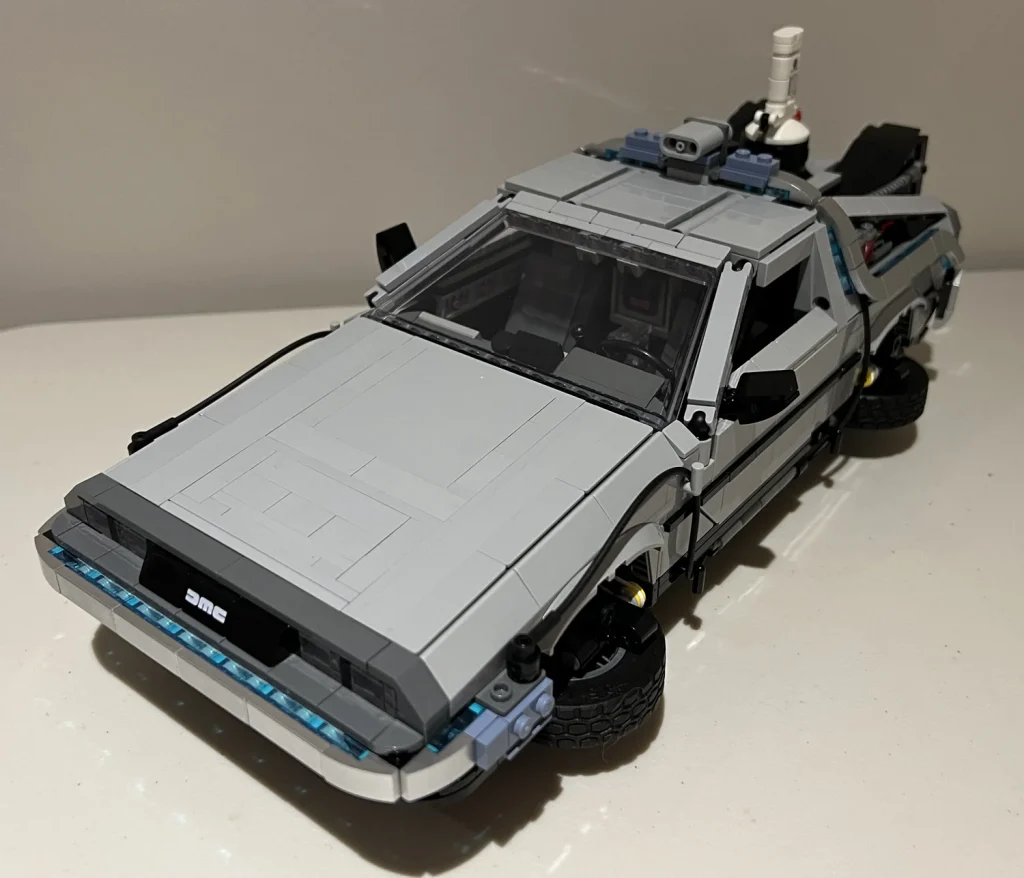
Adding the front fenders and the bonnet really starts to show the Time Machine is based on a vehicle platform. The bonnet mechanism is also quite effective. We’ll see later that not only can it open but it also fits very nicely into the overall bonnet space with few gaps.
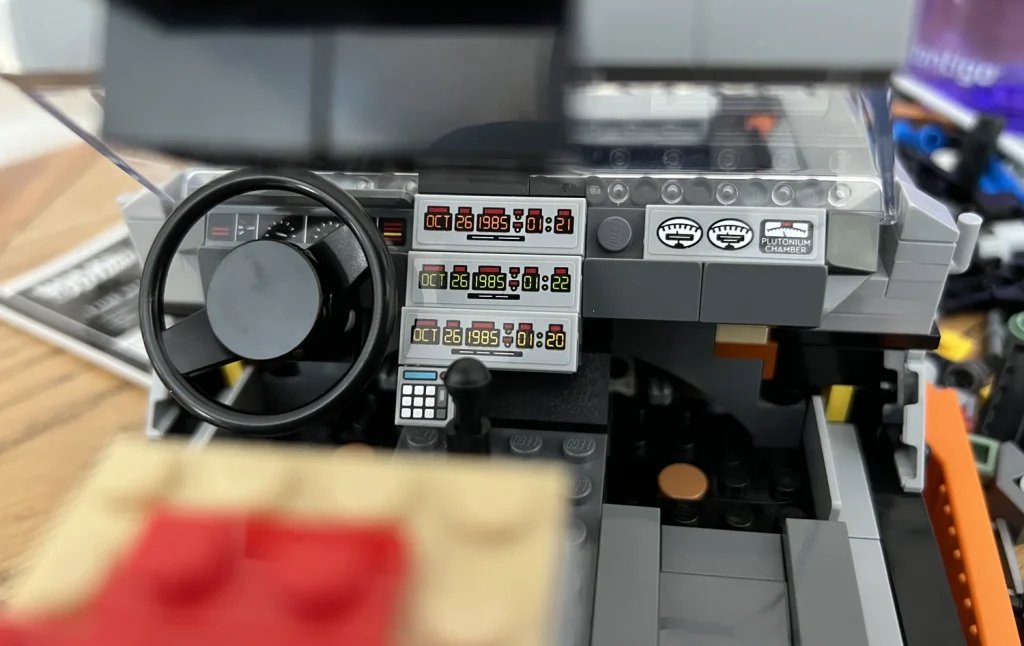
Overall the set does have a few stickers to be applied, but generally it’s not too onerous. In this example, the interior dashboard looks very smart and reflects the 80’s retro “future” of the car well. The windscreen is a brand new part and we’ll see more of it in future pictures.
There is a mechanism installed into the vehicle which activates a light brick with a small press of the black 1 x 1 circle tile. It lights up the Flux Capacitor to start generating the 1.21 Gigawatts needed to travel through time! I really like the small rubber rocker which keeps the light/power switch from being pressed unless you want it down. Again, it’s simple, but effective.

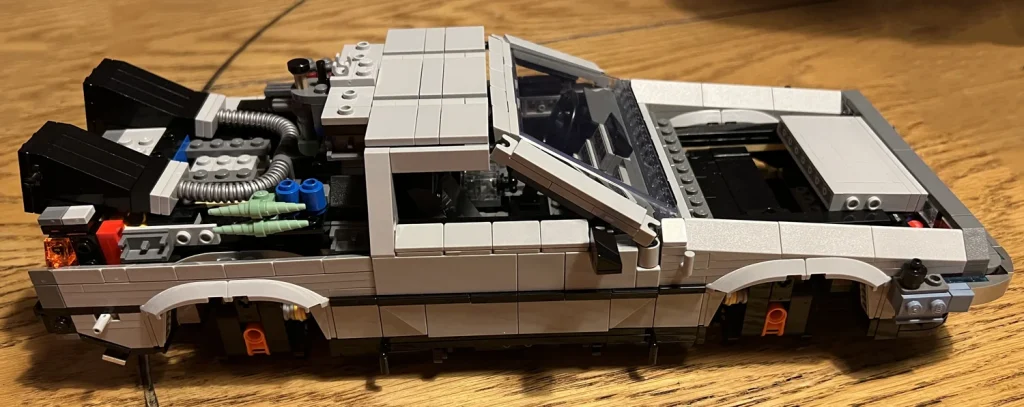
We continue building the gull wing doors, rear exhaust stacks and other key engine components. The use of the ball joints for the A pillars next to the windscreen is quite effective in getting that challenging angle filled. It’s not perfect of course, but the angular nature of the car make it work.
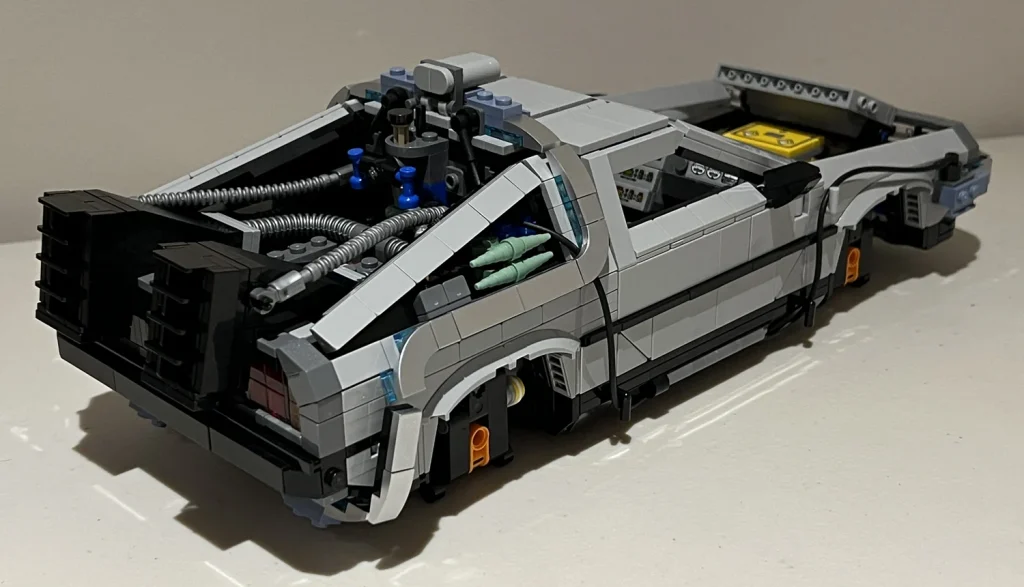
The set allows you to choose three different variations of the Time Machine – each one representative of the movie that they were shown in. But at this point, I need to confess a dirty secret I’ve been holding in so far.. I’ve never actually seen the Back to the Future series. I know… it’s my secret shame.
So for this model, I picked the model that represents the second Back to the Future movie as I preferred that look. But don’t worry, I also made a note to watch the BTF series with Oscar next time we’ve a spare few hours to binge.
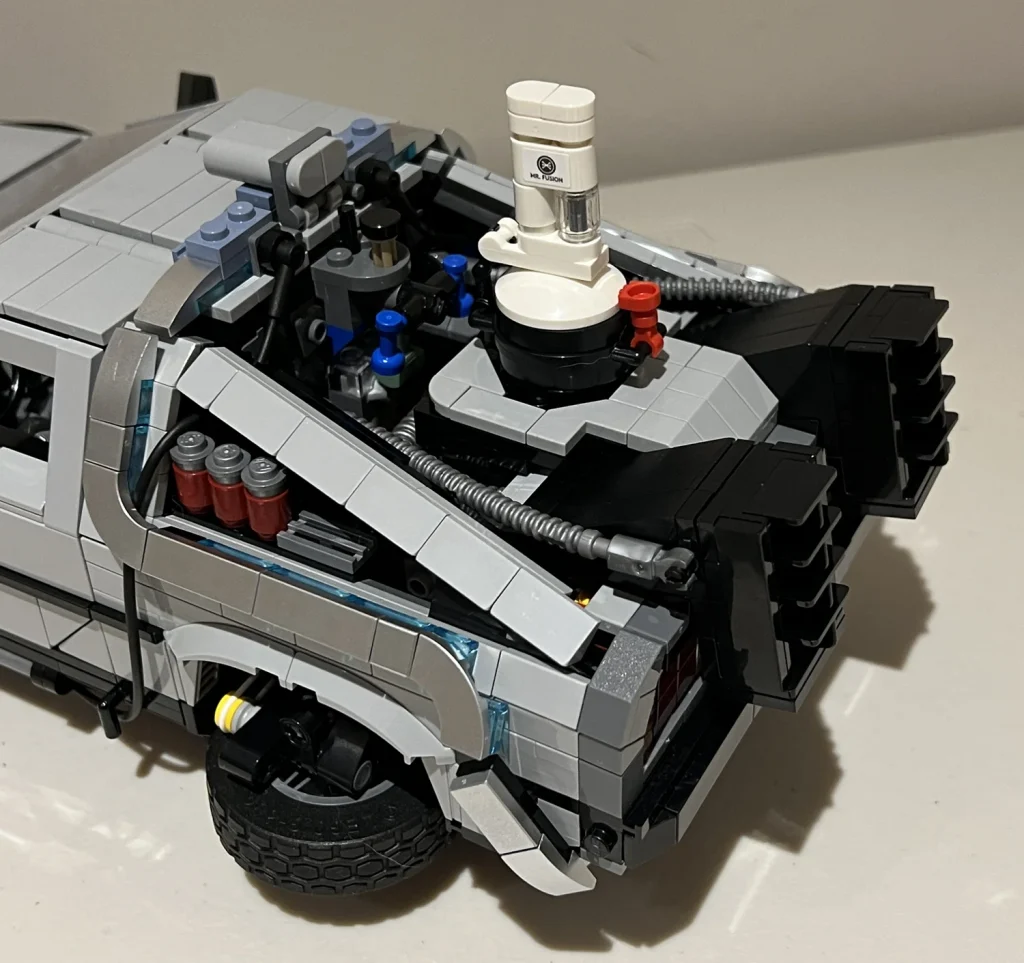
As we finish the motor compartment of the Time machine, I was surprised to see a banana and a drink (maybe beer?) in the fuel compartment. No doubt there’s some tie in to the movie, but have I mentioned my shameful ignorance yet?
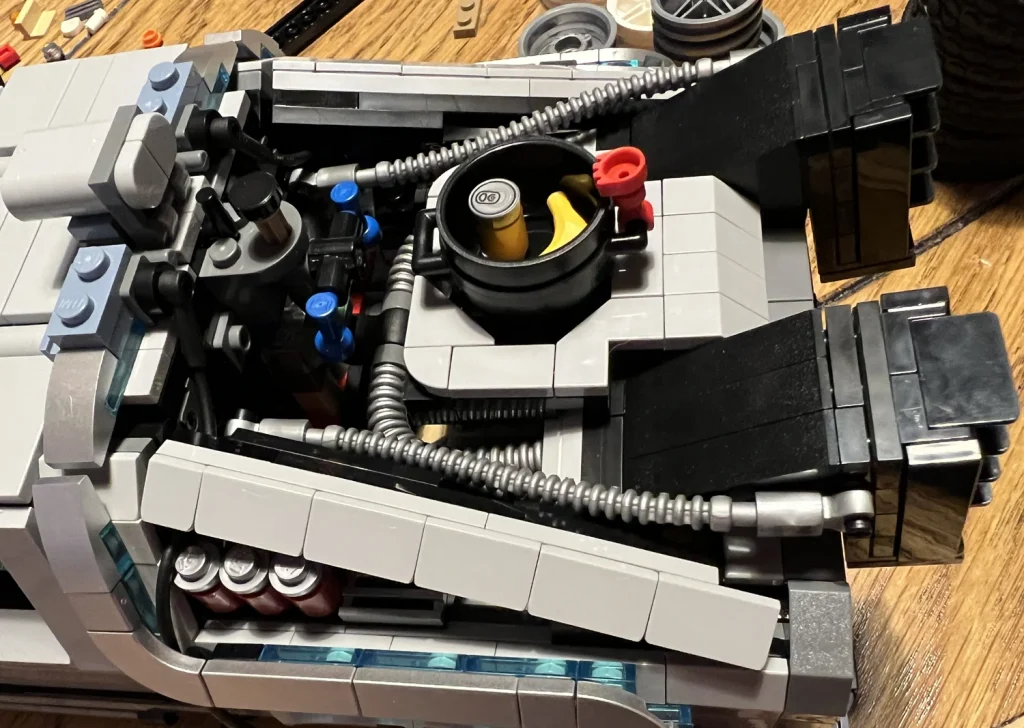
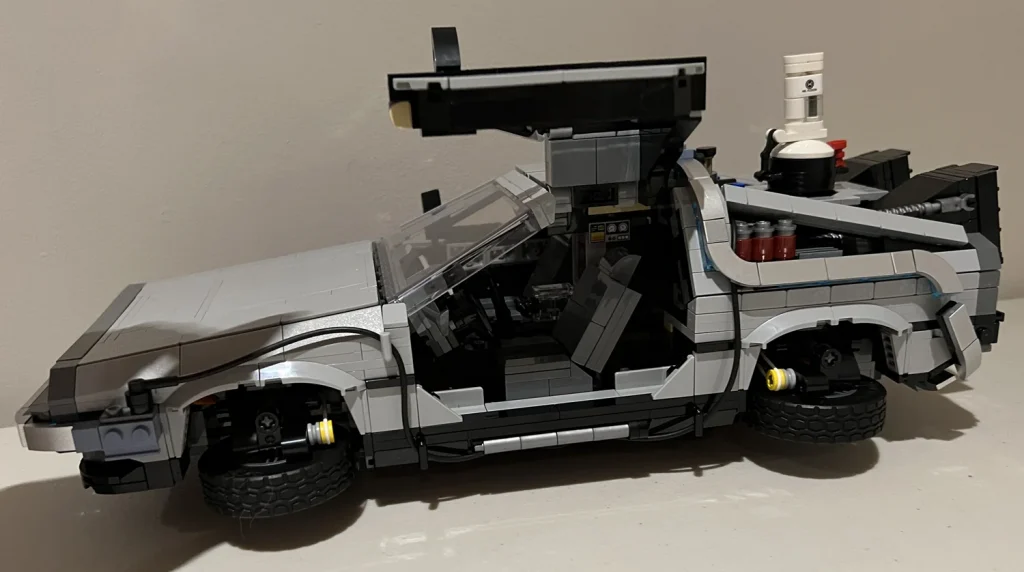
We finish the model by completing the bonnet and finalising the time travel components on the rear. There’s a few more hoses involved as can be seen too.

In addition to what can be seen above, you also get quite a few spare parts to allow you to build the other two versions. I prefer the clean look of the model above, but the red hub caps and white wall tyres are pretty awesome too!
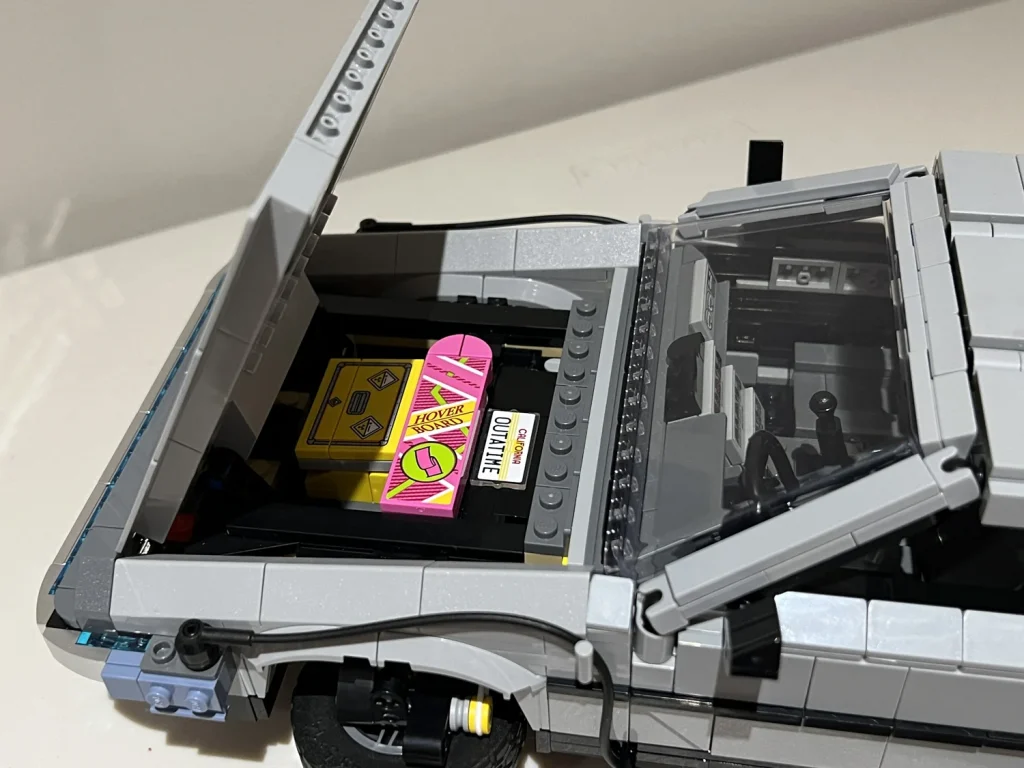
The final part of the build is the Back to the Future placard. It’s still sticker based but hopefully over time the LEGO group will start to pre-print these. The iconic hoverboard is also included and fortunately can even be stored in the frunk (front – trunk). I personally would have made the stand an extra stud wide as both Doc and Marty can’t stand directly next to each other without holding hands.
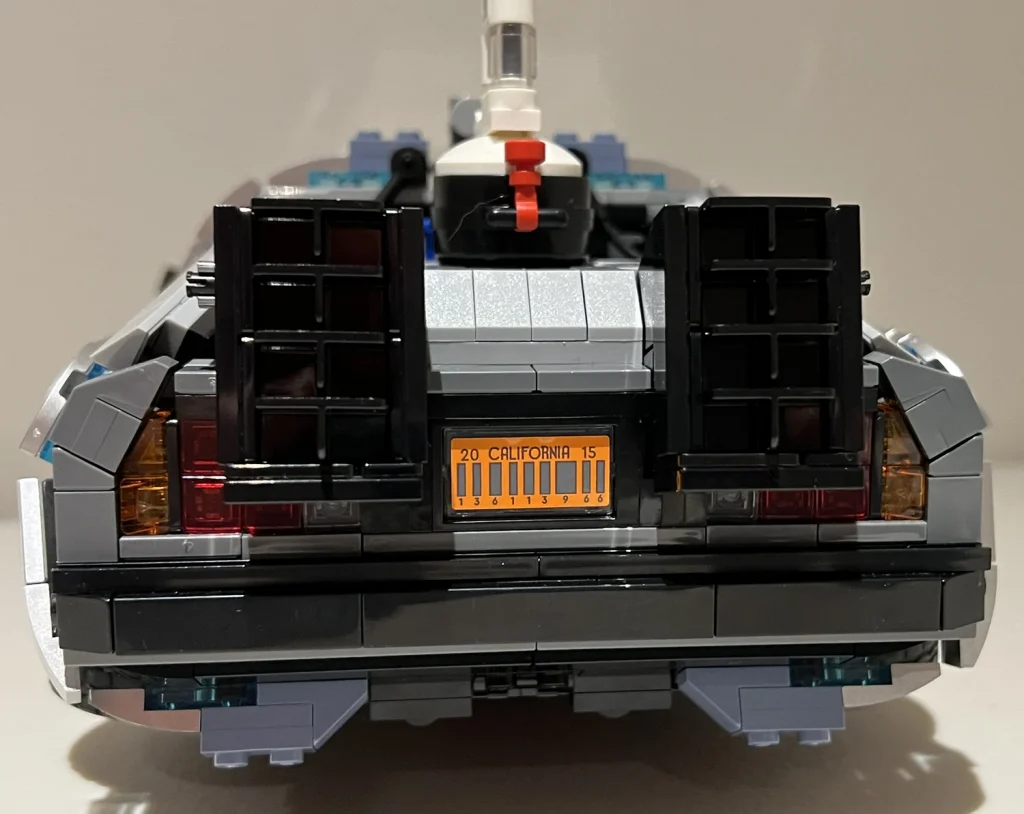
The finished model is a great rendition of the original. Interestingly other than the DMC number plate, the DeLorean Motor Company is not mentioned anywhere else in the set so perhaps there was some licensing issues at play between the Back to the Future team and the DMC team?
In the shot below, you can also see the wheels rotated in time travel mode. The model sits on four 2×2 clear bricks to give a nice hovering look.
I just about forgot to mention the key feature of the DeLorean – the Gull Wing doors! The mechanism to open and close the gull wing doors is pretty smooth however it was a big miss to not allow them to remain open by themselves. As soon as you let go of the doors, they fall back into place.
Overall Thoughts

Overall, I really enjoyed building this set. There were a few minor quibbles, but even the biggest of those wasn’t major – the doors that automatically closed.
Having to admit my shame of not having seen the iconic series was a bit embarrassing, but I’m sure I’ll get over that soon. As a purely standalone vehicle, I give this set the tick of approval. Along with the Modulars, large scale LEGO vehicles are one of my favourite categories. The mechanism to change the wheels is excellent and the overall shape matches the original well.
The two minifigs are also on point and great additions to your minifig collection. If you’re a fan of the Back to the Future movies, that’s even more reason to pick up this great set.

Set: Back to the Future Time Machine
Theme: Icons
Set #: 10300
Number of Minifigs: 2
Number of Pieces: 1872
RRP: $299.99
Overall: 87%
A special thanks to our friends at Zavvi for supplying this set for review.

As a massive fan of both Back to the Future and Lego (I don’t know which was Christopher Lloyd’s better role, this or Commander Kruge in Star Trek III) I really like this set.
Certainly a great addition to the collection – That’s for sure!
Hi guys, I love tour reviews. I don’t often say much. One day I might get the pension fairy to afford one of these beauties.
Thanks Ray. Glad to hear. One powerball and we’ll buy a LEGO shop! 🙂