

Hello again old friend. It’s been some time since our last post. Today we’ll talk about how we sort and store our LEGO. We’ve a mixed bag in our house for build styles. I prefer to chill out, follow the instructions and turn my brain off a little. Oscar on the other hand is really creative and loves to get his MOC on.
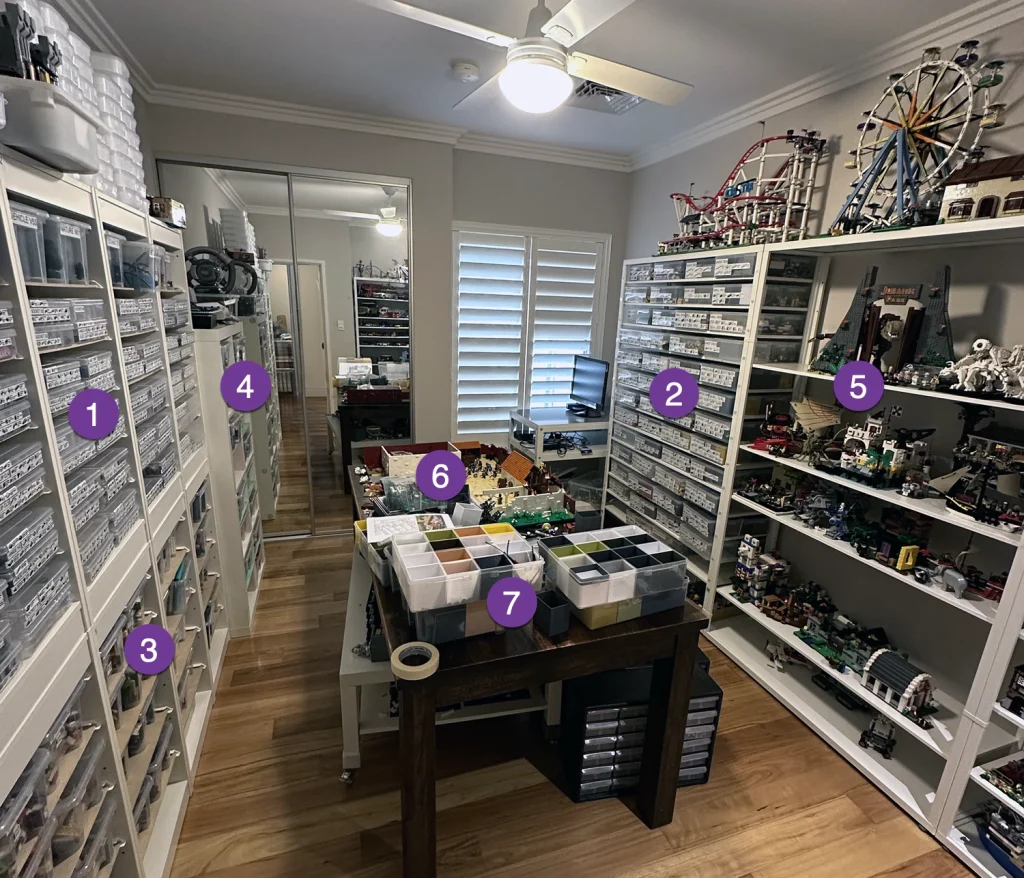
Like many LEGO fans, we’re also plagued with the never ending problem of where we store our built creations. We ended up breaking our love for LEGO into a couple of different areas. The build area and a display area. For this post we’ll focus on the build room and our workflow. In this room we have all our spare bricks. We also have a few of the models we really enjoy looking at (5), space to build the next big MOC (6) and some space to sort (7).
There’s an unlimited number of techniques to sort and store LEGO and we’ve come up with a bit of a hybrid approach. Our main criteria is to seperate by brick type. We don’t have a bricklink store, so we’re not too concerned with separating by colour as well.
Sorting by Colour or Type?
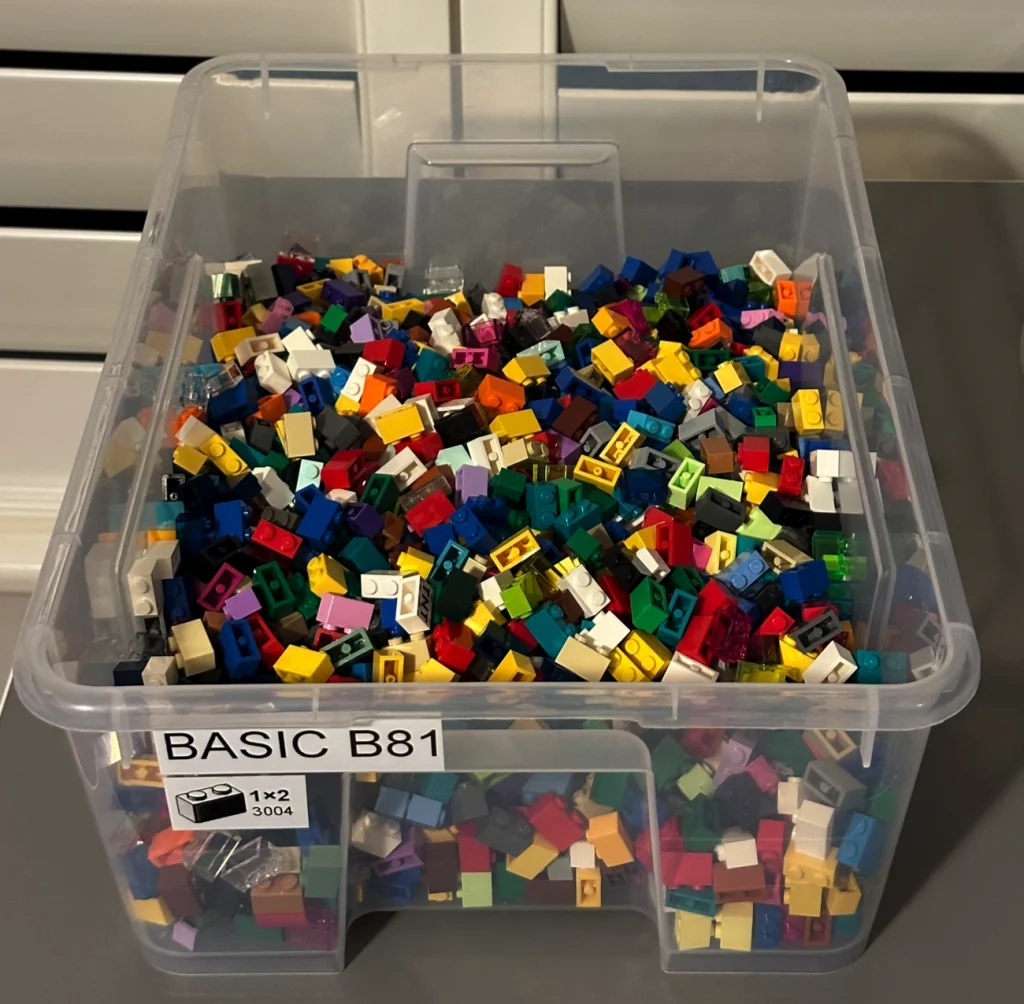
If you are starting out on your LEGO journey, you will be tempted to sort by colour. It’s so nice to look at in the storage tubs. But I beg of you, do not make this foolish rookie mistake.
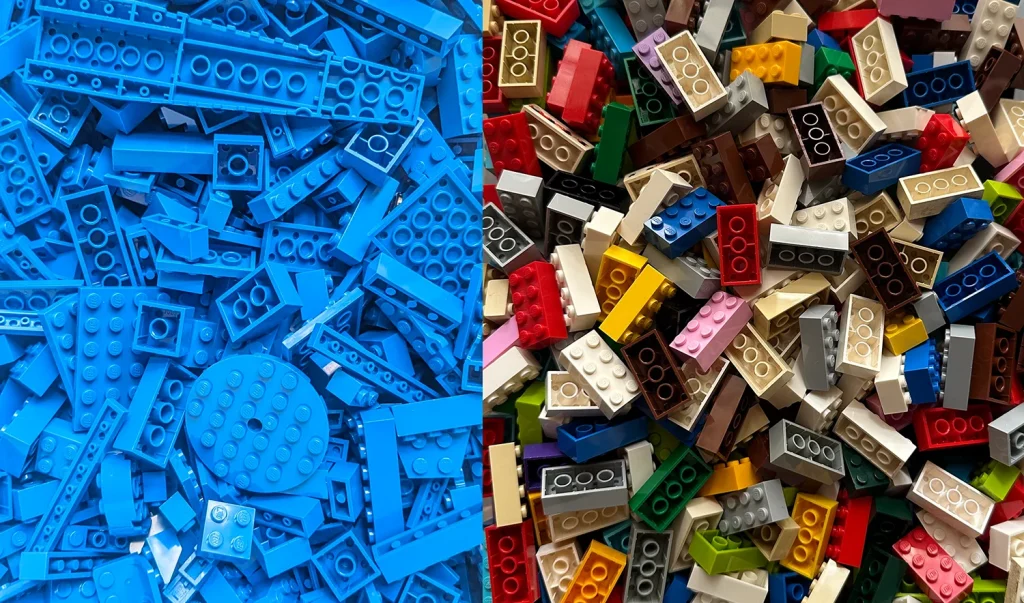
As you can see in the image above, once the bricks are all sorted by type, picking a blue 4 x2 brick is really easy. However, if you tried to find a blue 4×2 brick in a pile of mixed blue pieces you can see it’s quite a bit harder.
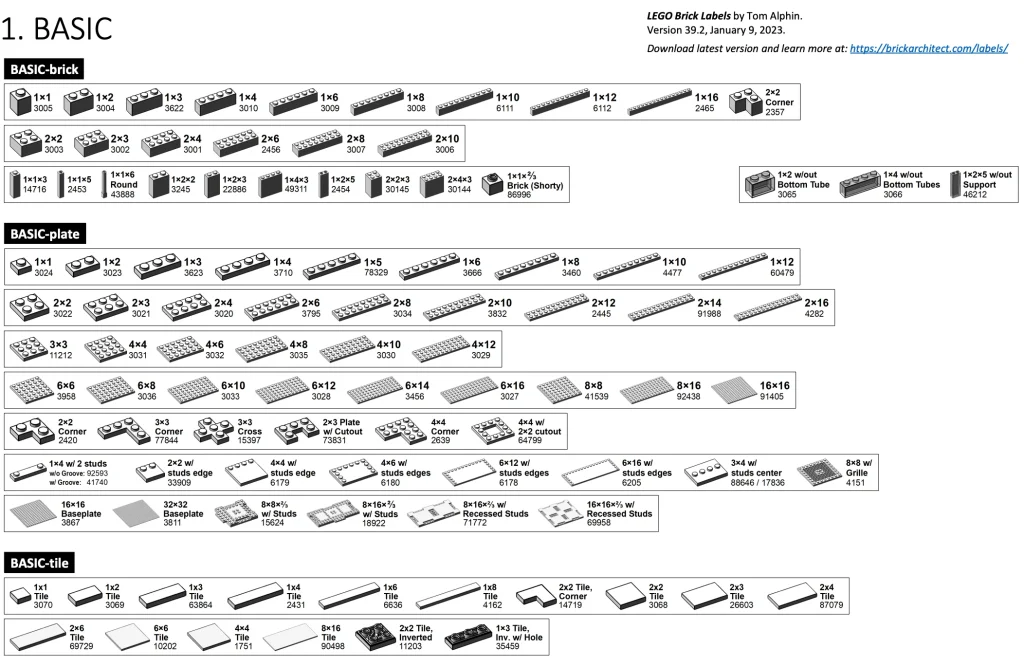
Now that we’ve aligned on sorting by brick, we needed to decide on how we might choose to categorise the bricks. Fortunately for us, a fair amount of the hard work has been done for us using the fantastic LEGO Brick Labels by the Brick Architect. It’s a collection of printable labels for LEGO bricks and parts., including over 1600 unique parts, including common bricks and plates, Technic and specialty parts, and even DUPLO parts. The labels are designed to be printed on ½” laminated label tape using common Brother Label printers.
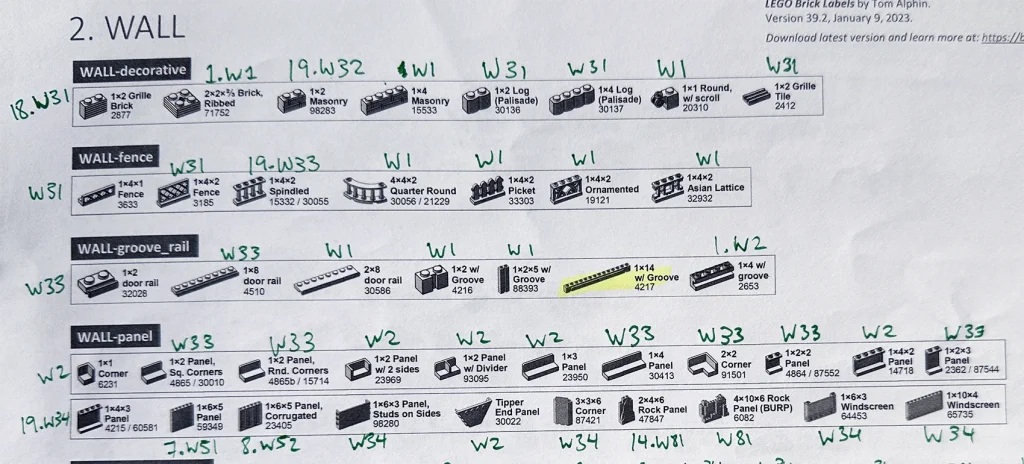
The main benefit of using this approach is that it’s very easy to categorise the vast majority of your bricks with pre-defined categories and also quickly label bins or containers. We’ve assigned areas of the room into sections in the same order as that found on the LEGO Brick Labels Contact Sheet. Not only is it easy to follow, it has the added benefit of a printed sheet we can use to quickly reference the location of each brick. Admittedly we initially had to annotate this manually, but the time spent was worth the effort. We’ll cover what each of these notes mean in the next post.
Within the room there’s 5 different types of storage. Broadly speaking we also try to align to the order found in the Brick Labels. It makes it easier to quickly scan the sheet, then find the right container. When selecting the containers the two key attributes we were chasing were:
A) Relatively cost effective and B) Likely to be in stock for a long time so we can buy more. A secondary consideration was looking at which units will fit into cabinets we already owned and could re-use.
The Storage types we ended up landing on were:
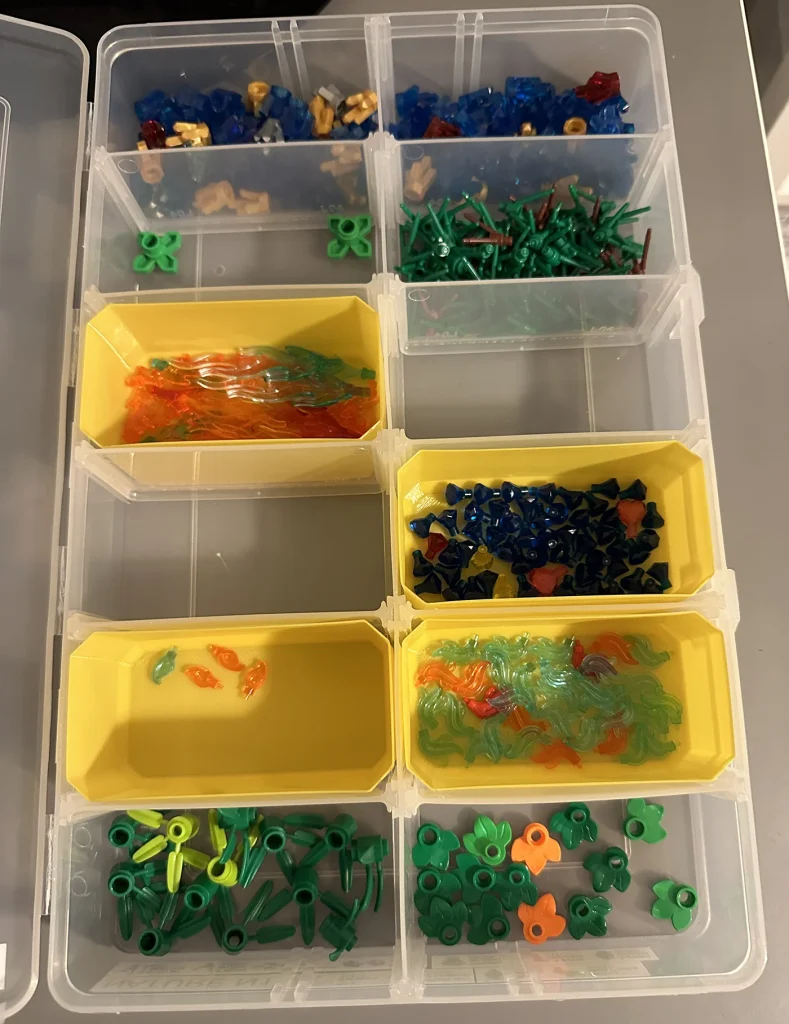
Section 1: Bunnings Montgomery 12 Compartment Storage Box
We use these boxes for pieces that we only have a few of. They are also quite adaptable as they can have individual sections enlarged by removing the small plastic dividers. We’ve also allocated space for additional parts which we don’t have, but may add more of in the future.
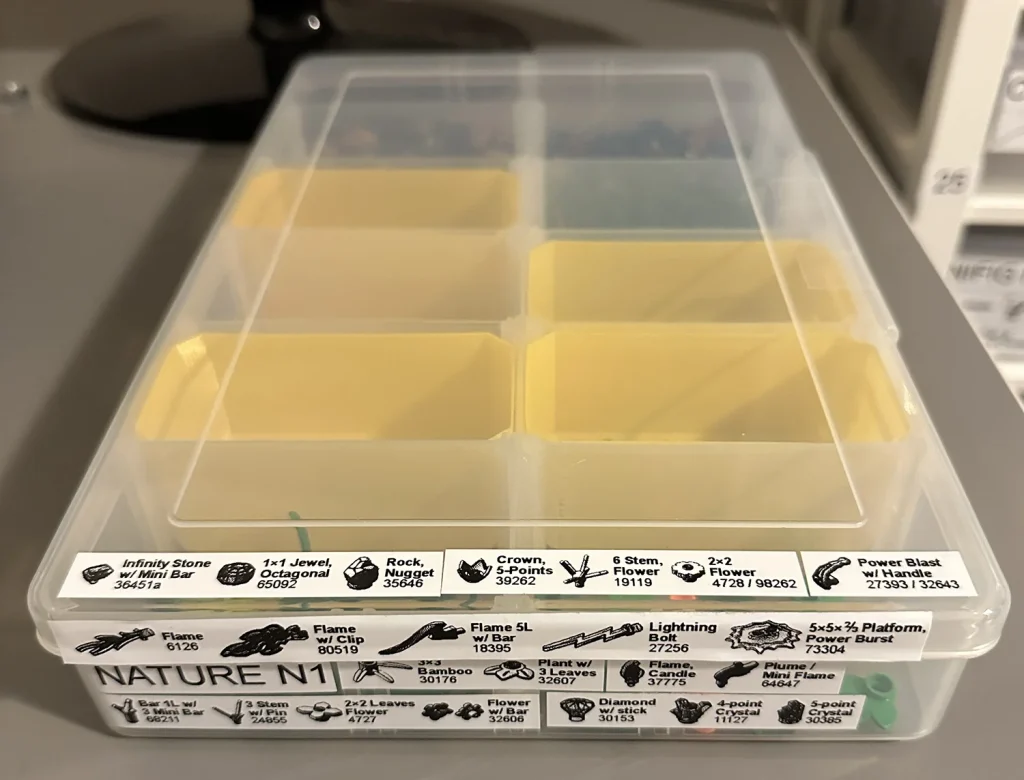
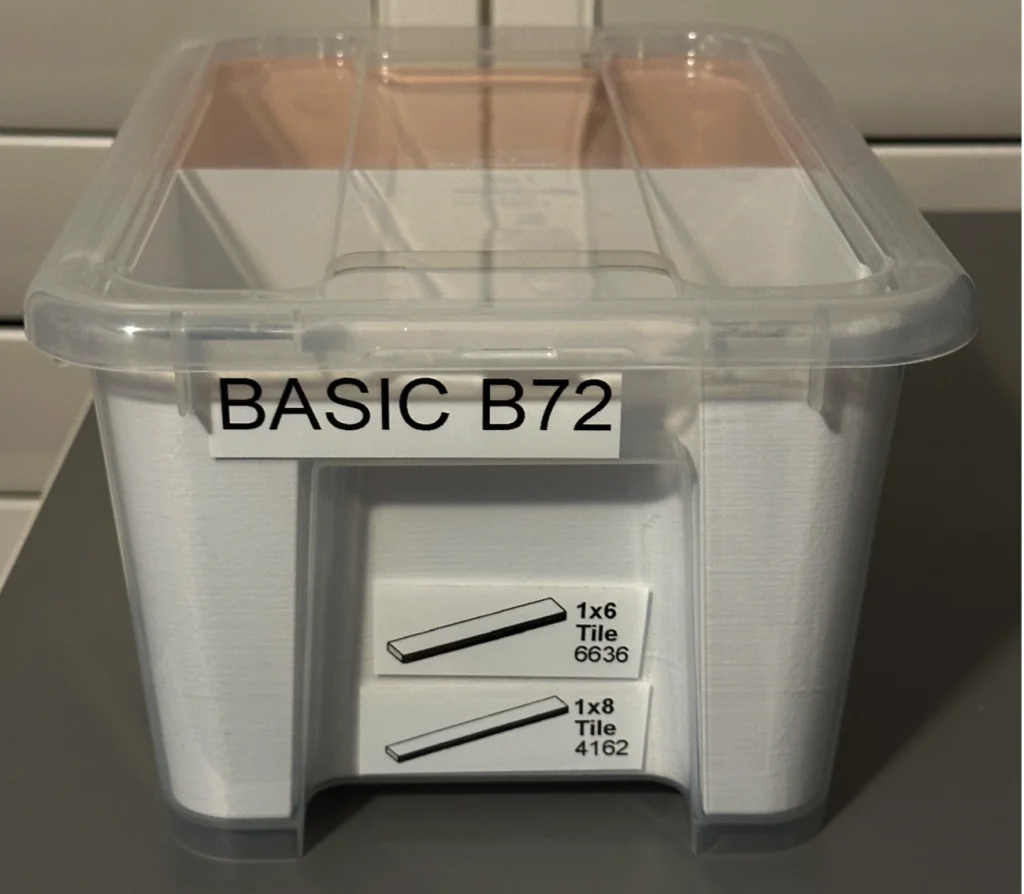
The only downside of this container is that the removable component also means there is a slight gap that tiny LEGO pieces can get stuck under. For those scenarios we designed a very light weight 3d printed container that will sit into a standard slot. Not only does this prevent the pieces sliding under the moveable plastic barrier, it also makes it much easier to remove the pieces and pour them into your hand. You can download the files to print at your leisure.
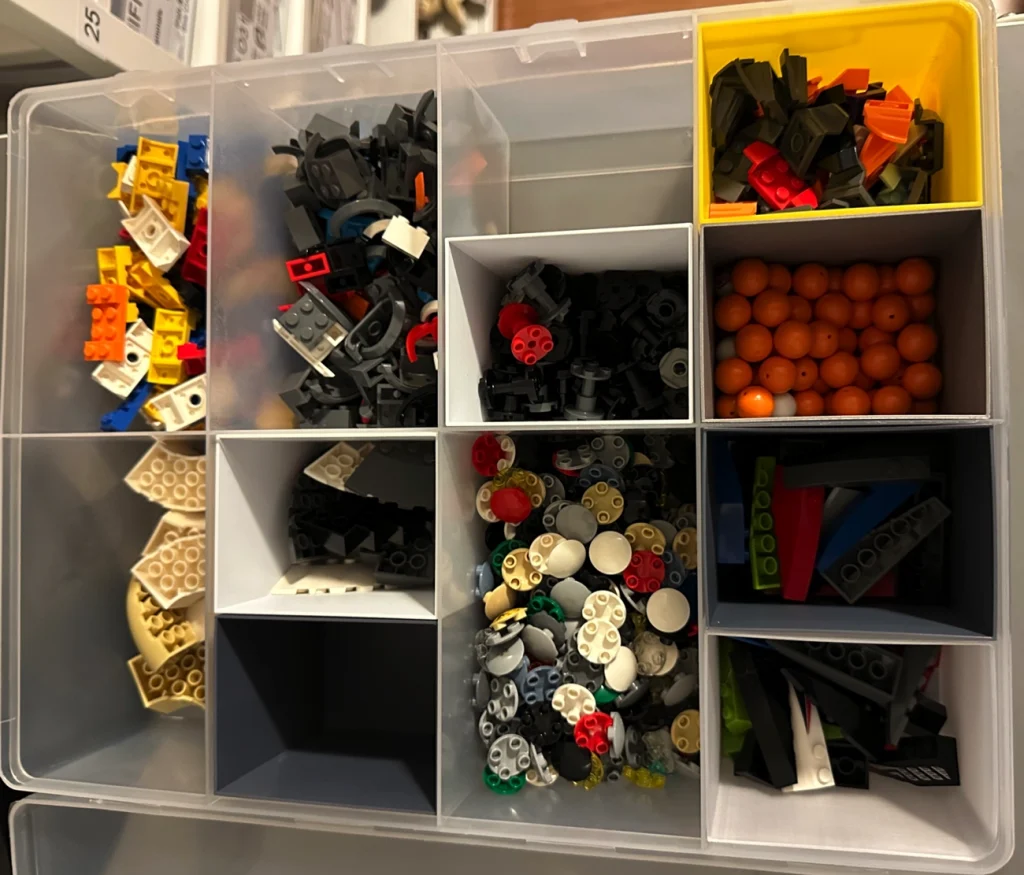
Section 2: Bunnings Montgomery 8 Compartment Organiser Storage Box
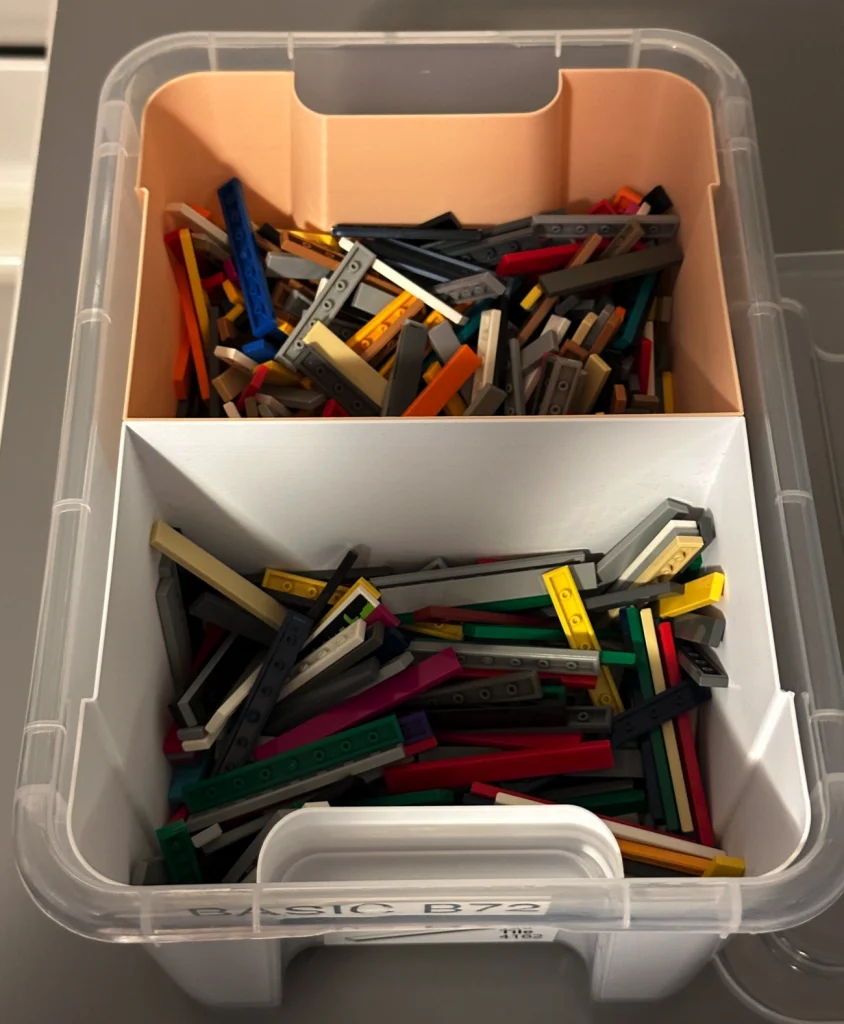
As the brick quantity gets more than will reasonably fit into the container above, they get put into the 8 compartment units. These are typically quite enjoyable units to use as each “slot” is large enough for your hand to scoop bricks out of. In addition they fit bricks up to 16 studs long quite nicely. As our collection grew, we rapidly worked out that there needs to be a middle ground between the smaller 12 compartment storage container and this larger 8 compartment container. Enter our 3D printed solution to expand the number of compartments.
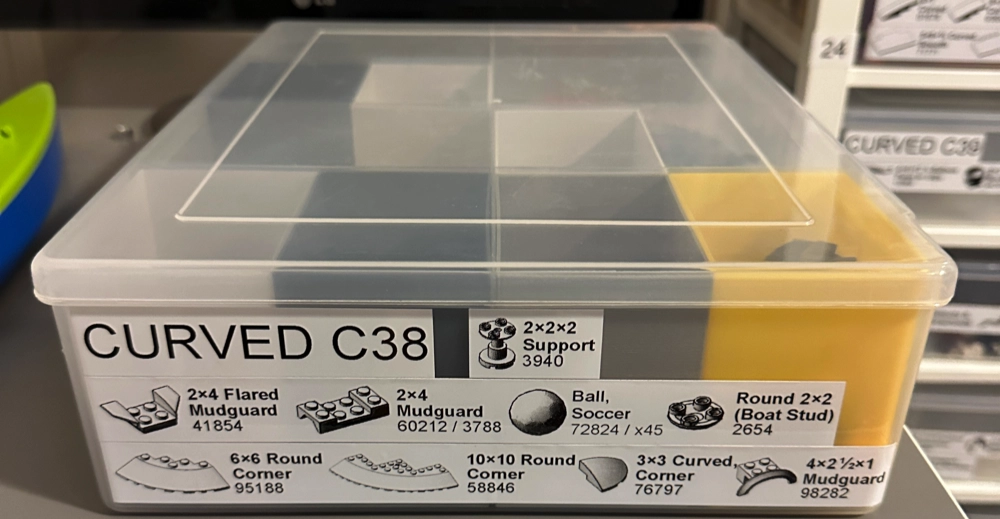
It’s another small 3D printed box that fits within this unit to double capacity to up to 16 larger components than that in the 12 compartment storage. Again, it makes it much easier to remove the bricks from the slot. You can download the files to print at your leisure.
Ultimately any of the 3D printed versions are not going to be cost comparable to having something mass produced with injection molding. But if you have a 3D printer and some spare time, it’s a nice little solution.
Ikea SAMLA 5L Storage Tub (with Clippable Lid)
Once a brick type outgrows the Bunnings storage boxes, we step up to everyone’s favourite Swedish store – Ikea and their famous SAMLA series. Our first foray into this range is the 5L Samla box. It stores a fair amount of bricks and is commonly used in our setup with only a single brick per 5L box.
But we can’t help ourselves so also use a 3D printed insert to split the 5L Samla box in half where needed. This is less common as the cost of printing this insert starts to become counterproductive to just buying a new 5L Samla box.
You can download a fully customisable insert creator for the SAMLA boxes created by Alex9779 on github. It’s excellent and lets you modify the insert in a wide variety of ways.
The main reason we occasionally use this approach is that we’ve run out of space to store more of the SAMLA containers.
Ikea SAMLA 11L Storage Tub (with Clippable Lid)
Now we’ve moved into the big daddy of our storage solution. The 11L Samla tubs. With the exception of 2×4 bricks, all of our other bricks don’t exceed this storage tub size for a single brick type.
They’re easy to have bricks shuffled through and easy to stack for bulk brick storage. In instances where a single brick type exceeds one 11L tub, we’ll extend to a second tub, but so far this has been quite rare.
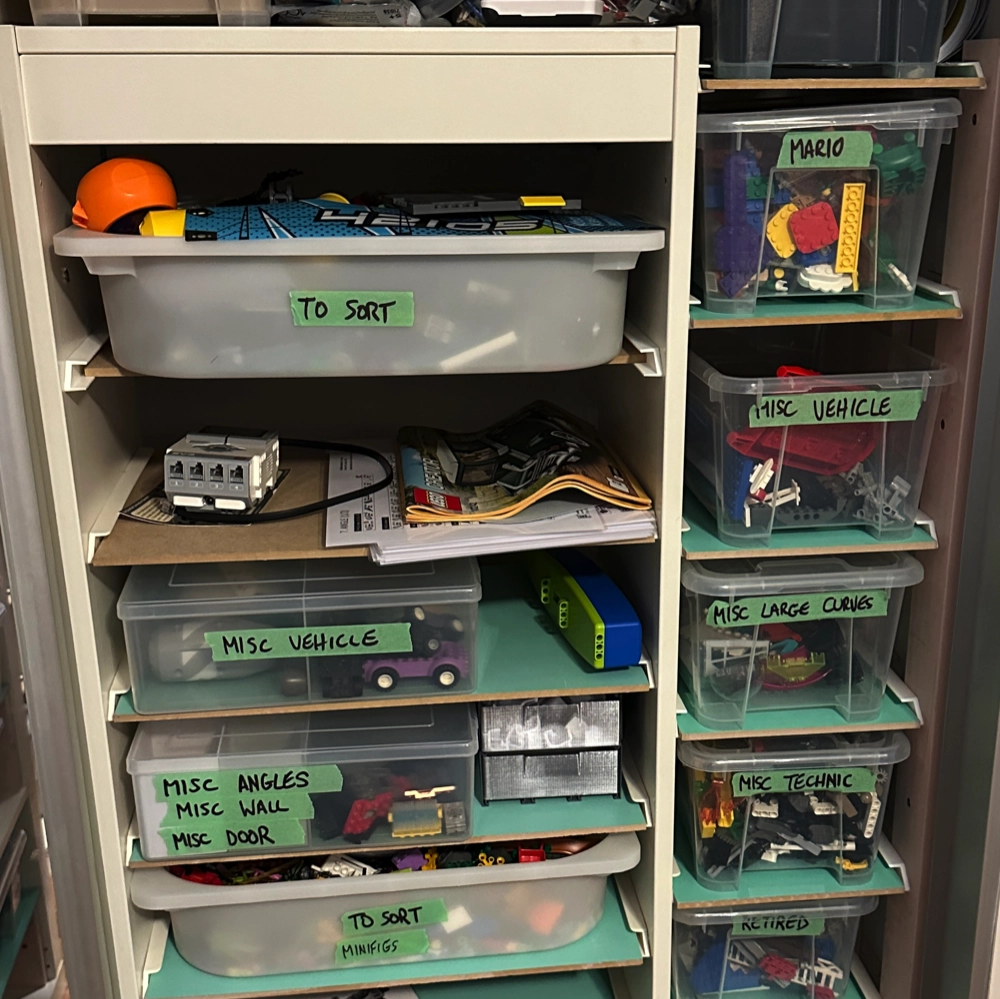
Ikea Trofast Storage Tubs
Like many LEGO fans, we’d love for our spare bricks to be constantly in a fully sorted state. However, in reality there’s often a lot of movement with sets being broken down, pieces found and new MOC’s created and re-created. As such, we need somewhere to temporarily store pieces not yet sorted and the other well known Ikea staple comes into play – the Trofast storage tubs.
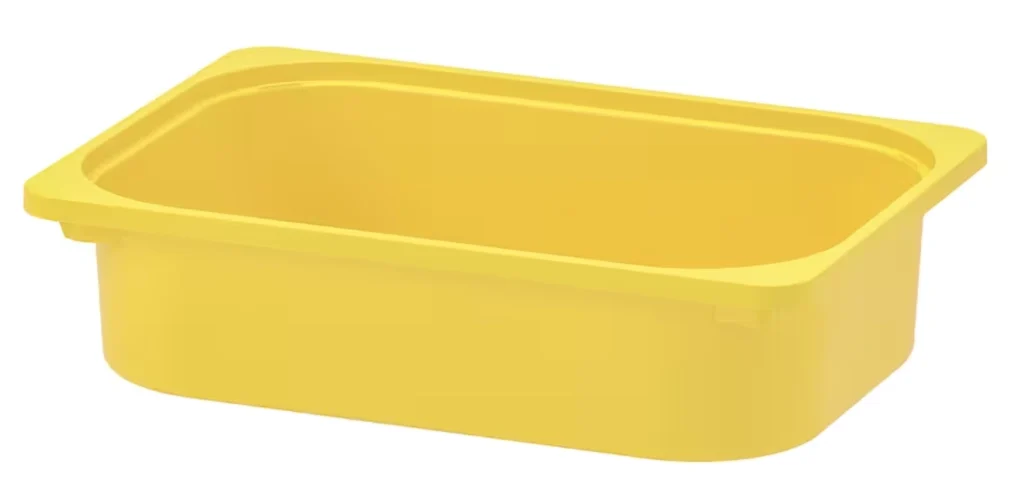
It’s estimated that there’s around 100 million of these in use globally, so there’s a pretty decent chance you’ve seen them or have them at your place.
Putting it all together
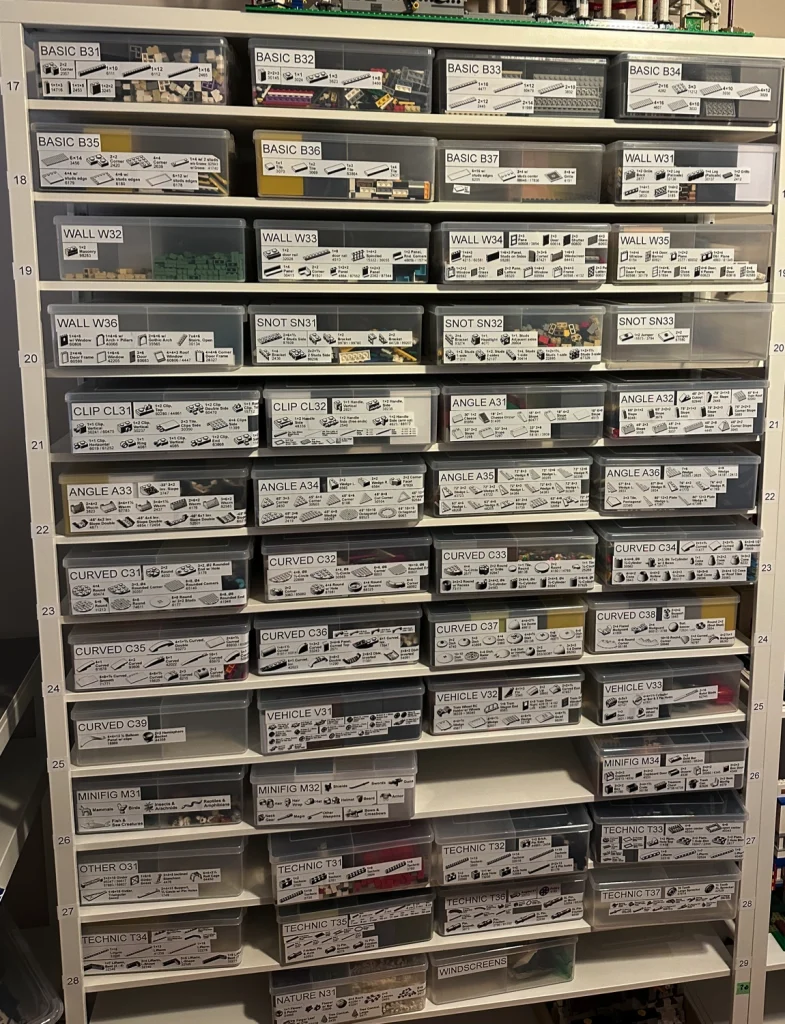
Once it’s all sorted, the use of the default categories found in the brick labels generally make sense. You can start to see the logic in the images below.
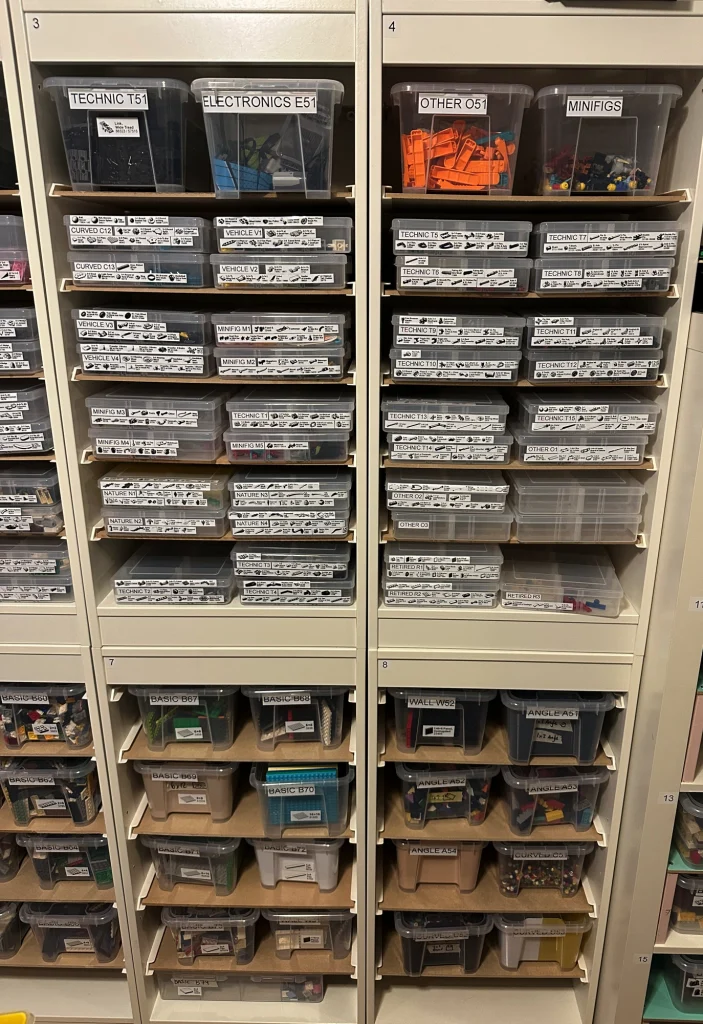
The image above shows the 12 compartment containers and the 5L SAMLA’s. The image below shows the 8 compartment containers.
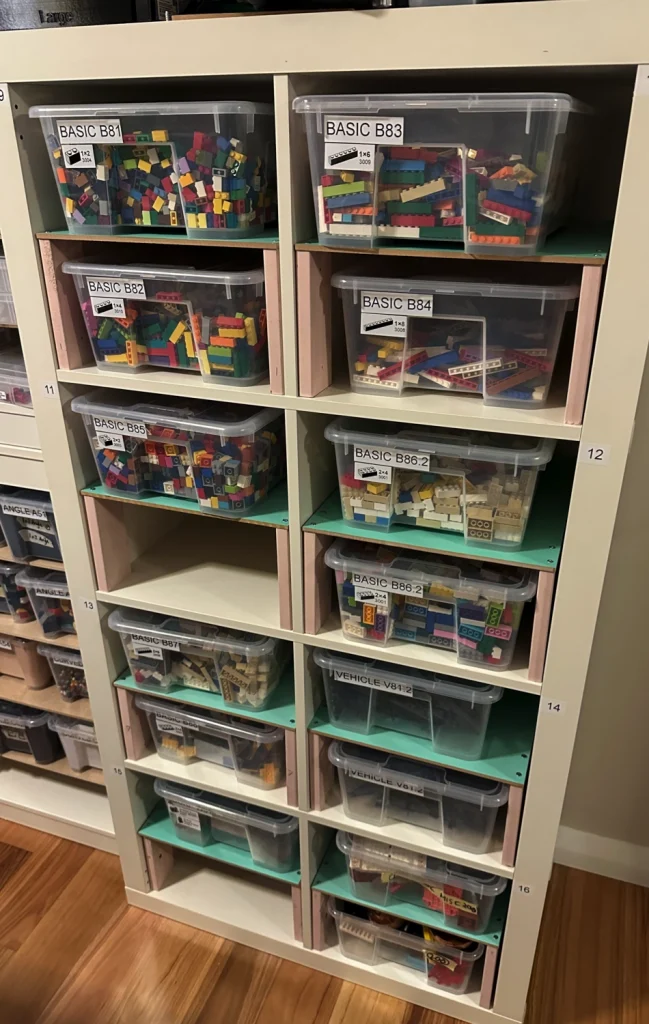
We then move to the larger 11L Tubs for common bricks.
What next?
After the hard work of sorting is done, it’s much more enjoyable building without struggling to find the pieces you need. Very common pieces become easy to find by memory or through looking at the preview sheet.
But sometimes there’s still pieces that are difficult to find. Perhaps your eyes have glazed over after looking at the sheet too many times. Or perhaps the Brick Architect hasn’t categorised them the way you would. Or perhaps it’s not even in the top 1600 pieces so it’s somewhere else.
Our next post will take you through our journey and how we’ve looked to solve that. Stay tuned and let us know your thoughts if you’ve got ideas we should try.
Happy building.