

Oh boy, this was a set I was pumped to get. I know I say that for every set, but this one looked really, really epic. Today I forge Thor’s Hammer Mjolnir.

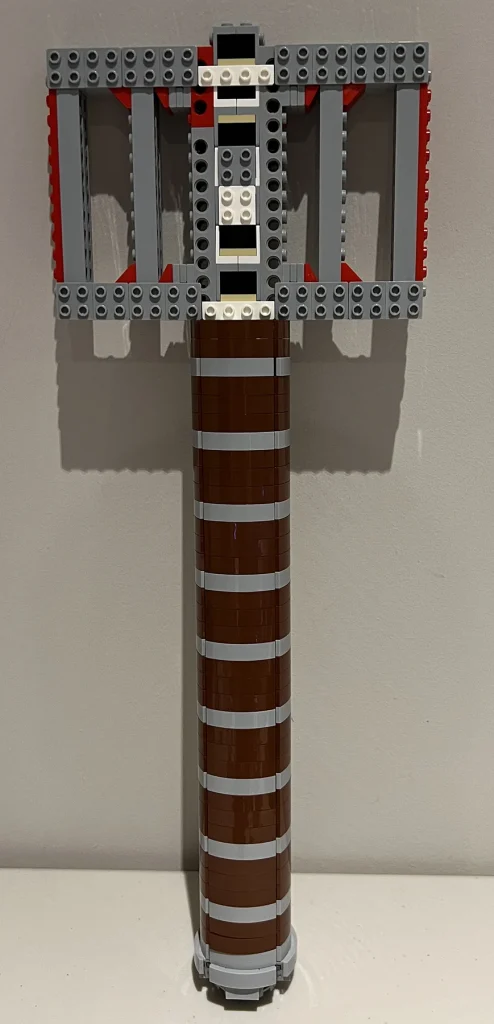
As I expected, almost all the set was making a technic frame. The first packets start by making the handle, which is strengthened by 4 super satisfying long frames that clipped onto a main column of SNOT bricks. At this point I started swinging the thing around, and to my amazement it was already super strong.
The next 2 packs covered the lining of the handle with 156 brown and grey 1×4 curved double pieces, which are surprisingly satisfying to put on in my opinion. It was at this point that a peculiar thought came to me, I started to actually feel as if I was one of the dwarves who made Mjolnir. I really felt as if I was creating the handle, and later in the build, forging the hammer. Now I don’t know if anyone else feels this or it’s just my childish imagination, but it was pretty fun nonetheless.

Once the curved pieces have been placed on all four sides of the handle, it feels really thick and large. This is probably due to my small hands and after debating with my dad, we concluded that since Thor is a god, his hands were probably much larger than ours. That’s probably the reason the handle is so thick, Thor would feel like he’s holding a twig if the handle was sized for our hands.
On top of the handle is the classic head, which on the inside comprises of a frame. On the top and sides of this frame you build the grey Uru metal outside of the hammer. Fun fact: Did you know that Mjolnir was forged from the heart of a dying star? The instruction book tells you this and some other stuff too!
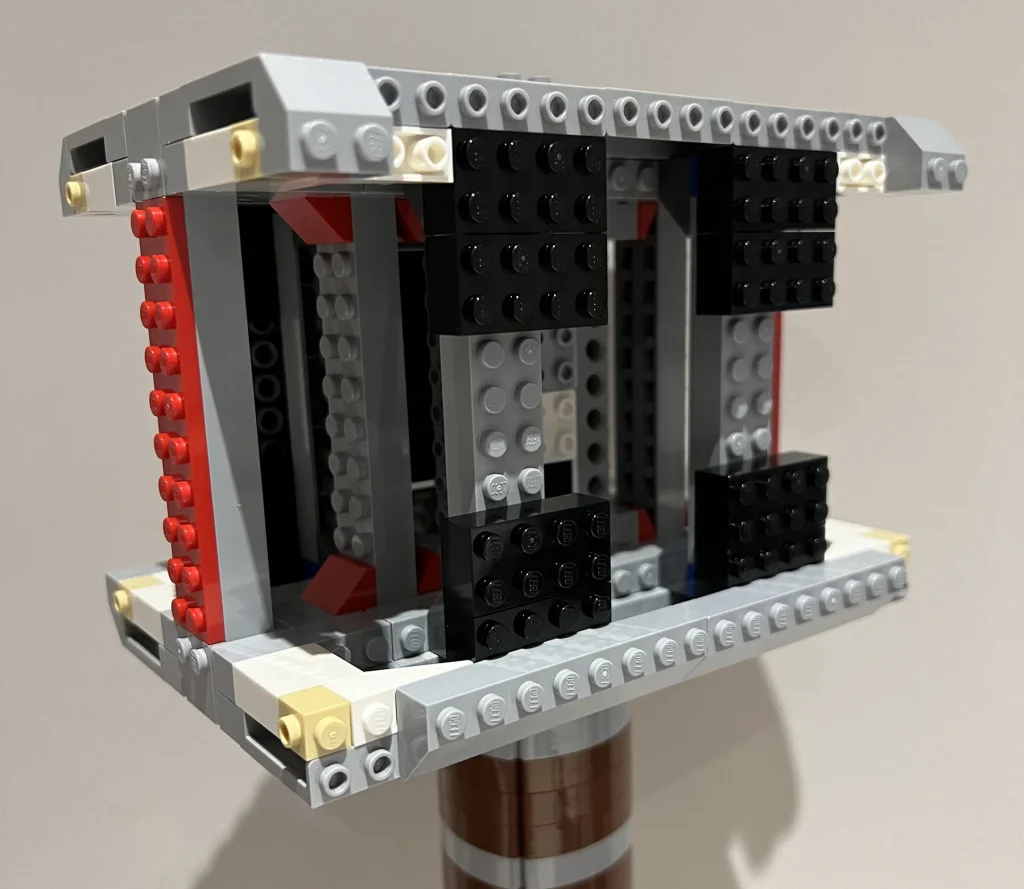
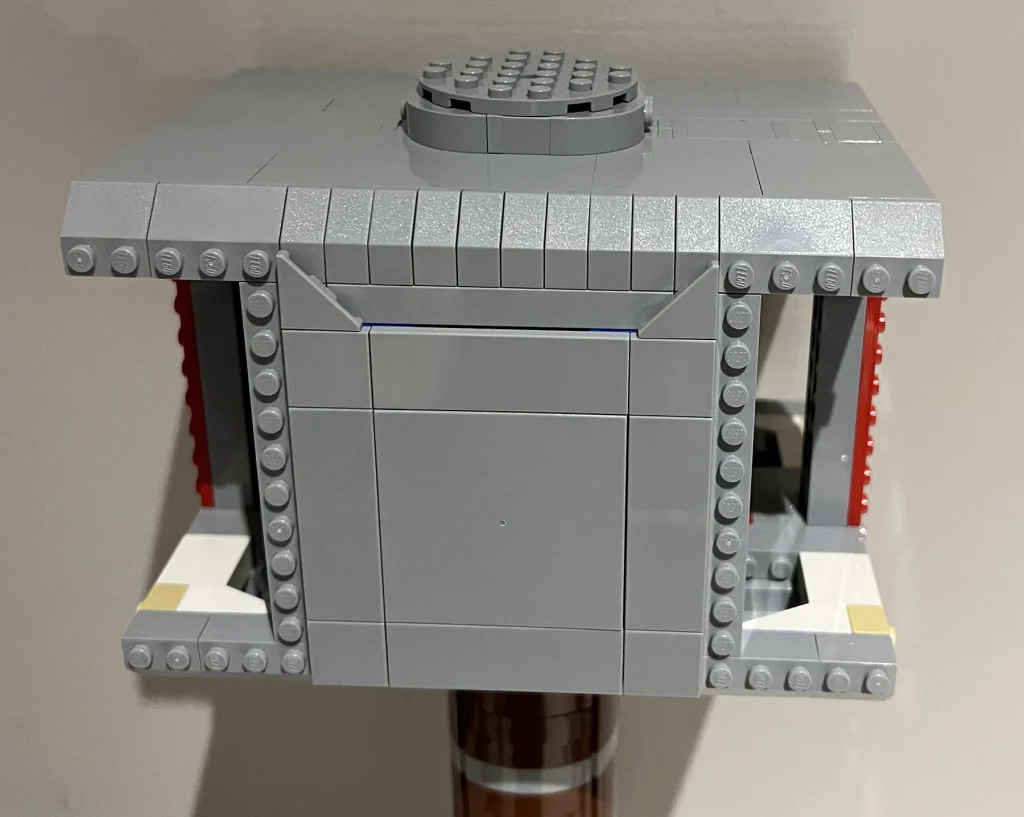
Pretend the hammer was laid on its side so I can show you how the head was built. On the handle side and the side opposite the handle side, the head is built upwards using grey 1x4x3 hollow stud panels. The top and bottom of the hammer are covered using mainly tiles, including 6×6 tiles. Finally, the two sides that you would hit your target with are made separately, using sloped bricks on the sides and 4 of those 6×6 grey tiles on the top. These 2 sections are then clipped onto the main head of the hammer. Sorry if this was a bit confusing, I tried to explain it the best I could.
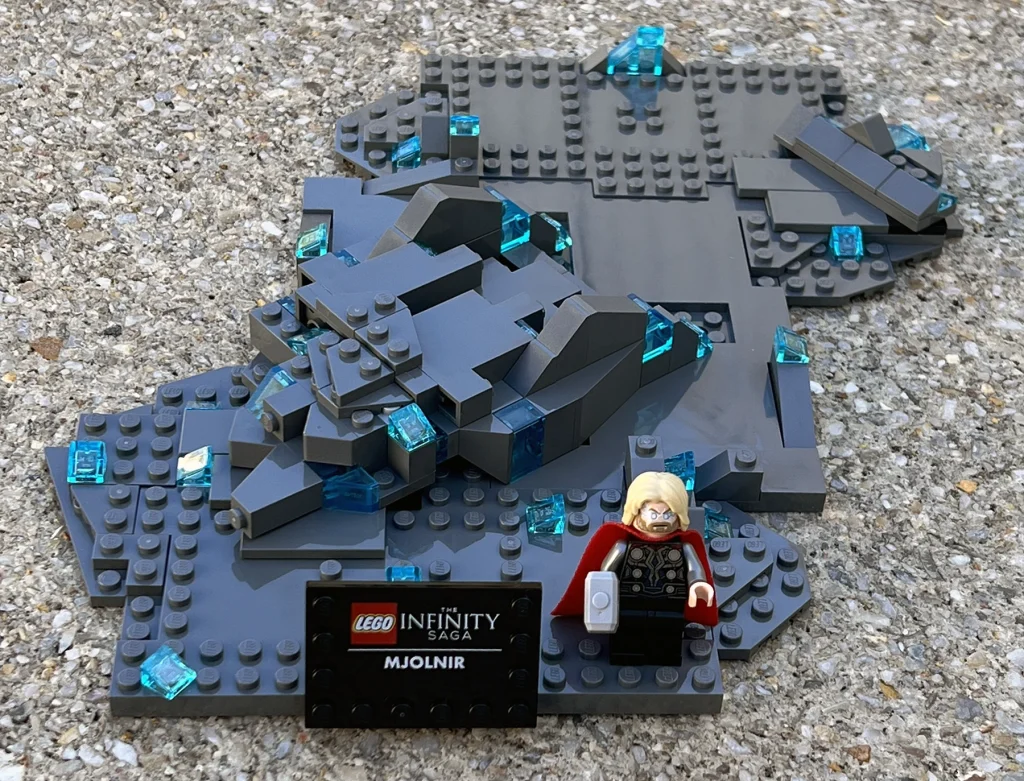
Once this is done, the hammer is complete! But the set is not finished, it also comes with a Thor minifigure and a baseplate for the hammer to stand on. I think the designers incorporated the baseplate very well, as it looks like the broken, lightning-infused rock which Thor’s hammer landed on in the first Thor movie. The hammer stands very well on it and there is also a sign which Thor can stand next to.
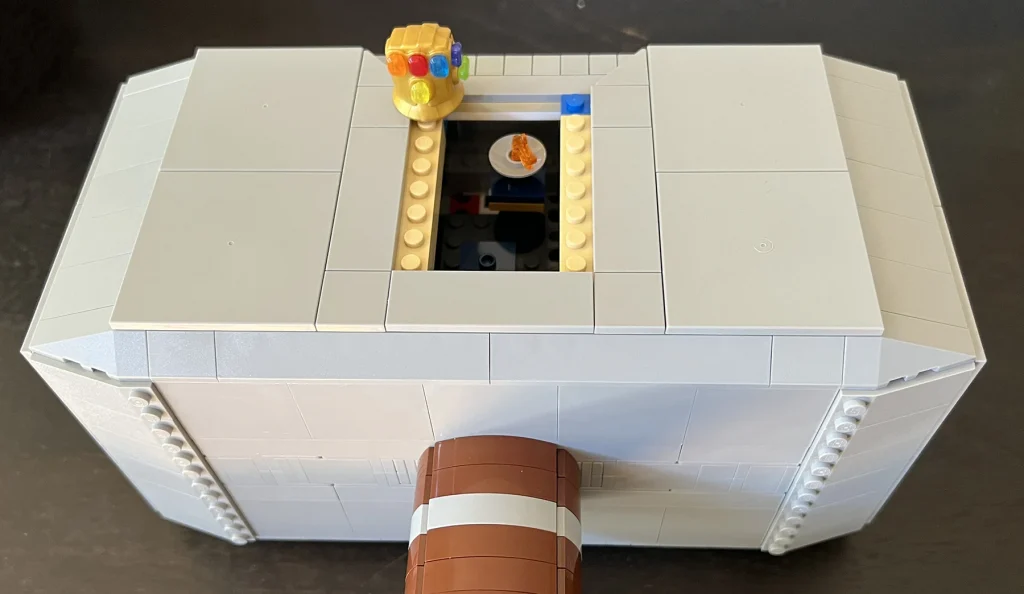
The final thing I almost forgot, were the 3 treasures that come with the set. They have a little blue stand for them to stand on and can actually fit inside the frame of the hammer for storage! Yes, you can remove the 6×6 tiles for inside access. The 3 treasures were the Tesseract – a transparent LEGO Minecraft head, the Eternal Flame, and the Infinity Gauntlet, which came with all 6 stones! I absolutely loved this since I have the Thanos big figure but not the full Infinity Gauntlet.
With the hammer forged and now in my hand, I was worthy! Swinging it around is an amazing feeling, though I think my dad gets very hyper and scared with every swing. Still worth it!
BUT… THERE’S MORE! CONGRATULATIONS TO FRANKIE PINNIX WHO HAS WON THEIR VERY OWN THOR’S HAMMER, STRAIGHT FROM OUR AMAZING FRIENDS AT ZAVVI!
Hope you enjoyed this review, have a great day!

Set: Thor’s Hammer
Theme: Marvel
Set #: 76209
Number of Minifigs: 1
Number of Pieces: 979
RRP: $179.99
A special thanks to our friends at Zavvi who supplied this set for us to build and give away. Check them out for some great deals on LEGO sets.
Overall: 95%

Everything about this is incredible! Even the base!